Horizontal pull-up
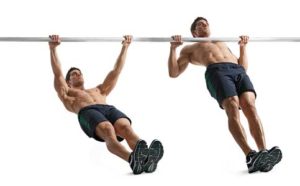
The horizontal pull-up or the inverted row as it’s also called is normally considered the first step towards mastering a real vertical pull-up. However, the horizontal pull-up is much more than that and should be part of any good workout program even when mastering real pull-ups.
In this article we will:
-
Go through the benefits of horizontal pull-up.
-
Look at different versions and how to perform them.
-
Suggest a progression template
First of all, why do you want to do horizontal pull-ups?
As mentioned in the beginning, a lot of people use horizontal pull-up as the first step towards a real vertical pull-up. There are several reasons why this is a good idea.
First of all, the horizontal pull-up is easier to scale to a level that fits everybody. This is because the feet are in contact with the ground and can be used as support.
Secondly, and the biggest reason why you should include them in your workout is that they are excellent to work your back.
Any pulling exercise will involve the muscles in your back. However, the horizontal pull-up is probably one of the exercises that focus most on your back.
If you compare it to vertical pull-ups it focuses more on the rhomboid and mid to lower trap muscles.
So the horizontal pull-up is excellent for working the back, which often suffers from stiffness and weakness due to our lifestyles that involve spending massive time on keyboards, mobile phones and driving.
How to do a horizontal pull-up?
Below I will describe different versions, but the basics are the same.
-
Grip bar, rings, handle, and towel with both hands a bit wider than shoulders.
-
Walk your feet forward so your body reaches a horizontal position. The more horizontal the body is, the harder it will be.
-
Tighten your core and the rest of the body so it makes a strict line from heels to the head. Do not let the body arch.
-
Then drive your elbows down and back. Make sure to feel the pull coming from the back and squeeze your shoulder blades together. Keep your body tight through the complete movement.
-
Pull to your chest.
-
Reverse the movement. Make sure to apply same focus on the areas as above.
-
Do not fall in to your joints.
The intensity of the horizontal pull-up can always be adjusted by walking the feet forward or backward. As a rule of thumb, you can say that the more vertical the body is the easier the pull will be. On the other hand, the pull will be harder the more horizontal the body is.
Let’s now look at actual ways to carry out the horizontal pull-up and how to adjust it.
Door Pulls: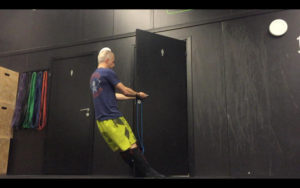
Grip a door handle and place your feet in a position that makes the pull doable but challenging.
Door pull with towel:
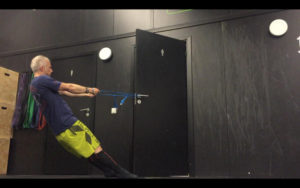
Same as previous but makes you go more horizontal, thereby making the exercise harder.
Bent leg:
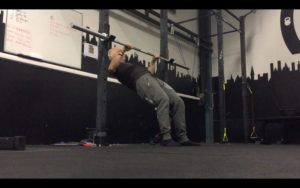
The upper body is horizontal, but the leg is bent to support the pull.
Proper row:
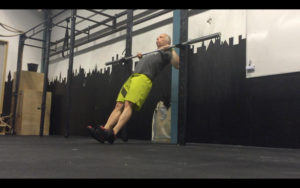
Uses a bar, rings, handles.
Legs elevated:
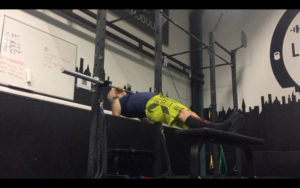
Place your legs at the same level as your upper body or even higher.
Video demos here:
How to progress:
The beauty of the horizontal pull-ups is that they can easily be adjusted, which makes progression fairly easy. In this example, we will use a variation of the well-recognized 5-3-1 method.
Find a version you can:
-
do 10 of it when fresh
-
do 5 of it when fresh
-
do 3 of it when fresh.
Now perform the following every week.

