American College of Sports Medicine releases every year a top twenty list of fitness trends for the coming year. The list is based on a survey that is completed by more than 1,800 health and fitness professionals worldwide.
For 2017, we have Wearable technology as number one, and in second place we have “Bodyweight training” which has been on the list since 2013.
So what does this tell us?
On one hand, people seem to be crazy about new technologies, but on the other hand, there is also a desire to go back to the basics when it comes to the actual workout. Fundamental exercises like push-ups, pull-ups and squats is what people want and with a good reason.
I also believe in basics. A good foundation is a platform from where we can develop our body. Without a good foundation, we will often fail or even worse get injured and give up.
In this article, we will take a closer look at one of the most fundamental body weight exercises.
The Air Squat


First of all, why do we call it air squat and not just squat?
Well, a squat can be done in many different ways. With weight, on one leg, jumping, etc. but in our case, we only want to look at the bodyweight squat and therefore air squat. We do it with air and nothing else.
With that being said, when we learn how to do a proper air squat we can easily apply that to any other type of squat.
Why do we want to do air squats?
One of the reasons why bodyweight training have become so popular is probably because most exercises are what we call functional movements.
A functional movement can be defined as a compound movement which involves many muscle and joints. Additionally,l it’s normally a natural movement which easily can be used in our daily day life. Actually, I’m quite sure that you do squat every day… think toilet 🙂
The air squat is no exception. It’s a movement that will engage most of our core and lower body muscles. So if we want to become stronger in these muscles, the air squat is an excellent place to start.
Besides the strength portion, it’s also an exercise that will require a good range of motion in order to do it properly. And why do we want that?
Think about the range of motion as being a set of tools and skills. What happens if we don’t use them? We lose them. And when the day appear where we suddenly need them they are no longer available, and we have to compensate for the lacking tools and skills. And we do this often with less efficient methods.
So, the range of motion is kind of the same thing. We want to be able to have access to it so we can move freely in different positions when we need it.
How to do a proper air squat?
As squatting has become very popular there is of course also a lot of thoughts on how to do it correctly.
I will give you my version. The one that works for me and many of my clients. This version also happens to be the generally accepted way on how to do a proper air squat, but again you will be able to find other versions out there.
First, a bit about the hip
People are different and so is your bone structure and therefore your hip as well.
Why this is important to understand when we talk about air squats, is that it will result in the need of squatting a bit different from person to person.
We can’t have one universal way to squat that will fit all people as the bone structure in our hips are slightly different. However, what we can have are key points to be aware of, and that is what we will go through in the tutorial below.
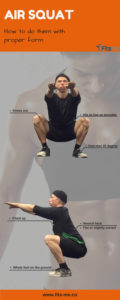
Step by step
Starting position
-
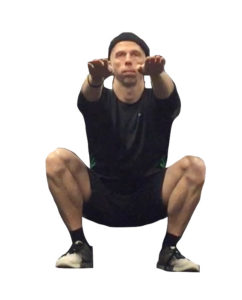
Take a comfortable stand with weight equally divided on both legs
-
The distance between the feet should be a bit more than shoulder width but listen to your body and find the right distance.
-
Feet should be pointing somewhere between straightforward to maximum 45 degrees turned outward.
-
The reason for this is that we want to keep tension in the hip and be able to press knees out. If we twist more than 45 degrees, it will be difficult, and we will have a higher risk that knees will collapse inward.
-
Engage your core by squeezing your but slightly and tighten your absWith this we create tension.
-
With this we create tension.
-
Extend your arms in front of you.
-
Holding arm in front of you helps to keep chest up.
Moving down
-
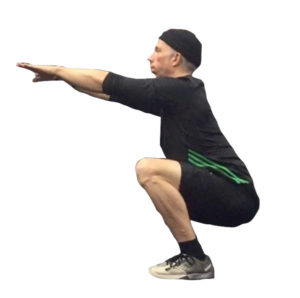
Start the movement by pressing your butt backward – imagine sitting down on a chair or toilet.
-
We want the glutes to work and if we bend knees first the quadriceps will start to work. We also risk that the knees will travel far over the toes which will add a lot of stress on the knees.
-
Bent your knees and squat down
-
Keep your chest as high as possible – don’t let the upper body drop forward
-
We want to keep a flat or slightly curved back. If upper body drops down, it is hard to maintain. Also, this position will engage the glutes. Where if we bend forward the quadriceps will have to work more.
-
On the way down press your knees outward – don’t let them collapse inward.
-
If knees collapse inwards, we lose the tension in the hip and thereby the control. Also by pressing knees out, we will engage the glutes.
-
Keep most of the weight on your heels and the whole foot on the ground – don’t go up on toes
-
For maximum control, we need a good contact with the surface.
-
Squat down as deep as possible but without losing above key points – stop when that happens.
-
Don’t “drop” down in the squat but move with a controlled motion.
Moving up
-
Squeeze your butt/glutes and raise
-
Again we want the glutes to work.
-
Keep all key points as described above.
Excellent, now you know how to do a proper air squat and what the major key points are. However, chances that you can’t do a proper air squat are rather high. Don’t worry, as we will now go through how to make them better.
How to improve your air squat
If you have googled “air squat” you have also seen that there are several suggestions on how to improve your air squat. There exists a ton of exercises and stretches on how to become better at squatting.
I did not say that you don’t need that, as it could help you. And actually, I will give you a few tips as well later on.
What I want to ask you is the following. “How did you learn to ride a bike?”
Did you analyze your joints and muscles and then selected different exercises that would help you to ride a bike?
Or did you just try over and over again, until you could ride the bike?
Chances are that you probably just tried it until it worked. I believe you should have the same attitude when learning proper air squat technique.
If you want to become better at air squats, you should do more air squats.
So here is how we do it
-
Follow my description on how to do a proper air squat
-
Move slowly
-
As soon as you do something wrong – stop and correct
-
Squat down as deep as possible – stop and correct when losing good form
-
When you reach your limit you raise and repeat the squat – now try to come a bit deeper
-
Don’t focus on speed nor quantity – only focus on form
-
Spend 5-10 minutes on this 2-3 times a week – it can be used as a warm-up
-
Above is a good approach to improve your squatting technique. But just as when we started to learn to rid the bike, a little help could be beneficial. At that time, we maybe had our parents to hold an attached stick for support. Or some training wheels were added to the bike. We were still on the bike riding it, but we just got little support.
Supporting exercises for air squats
Box squats
It doesn’t have to be a box. Actually, it’s better with something that can be changed in height. The reason for that is that we want to make it lower and lower as we advance.
We want to use the “box” to have something to aim at. Yes, you are right I want you to aim your butt towards the “box.” This will make the movement right.
Also, we can use it to give us a security platform which we can fall to if we lose the form.
Now simply work on your squats and try to get the box lower and lower.
This method can also be combined with the “Squat therapy,” which I will explain next.
Squat therapy
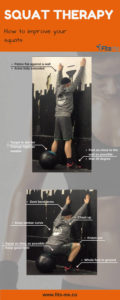
In the squat therapy, we will squat with extended arms, placed on a wall in from of us. This will both give us support and at the same time force our body to move as we want it to.
Squat therapy is not only for rookies, but even experienced people can benefit from this.
-
Start around two feet from the wall – the closer you are to the wall the harder it will be.
-
Extend arms and place palms on the wall
-
Squat down with proper form and let the hands slide down the wall – don’t bend the arms.
-
Return to standing with correct form.
-
As mentioned, you can have your “box” behind you during this exercise.
-
Now when you are satisfied with the form, you just move a bit closer to the wall and repeat.
-
Continue like this until you can’t hold a proper form. The goal is to have toes touching the wall.

